
 Our time capsule has been placed in the void between the gender neutral restroom and the rear wall of the sanctuary. Now that all the plumbing and wiring have been installed throughout the new addition, crews will begin to focus on installing drywall, and our time capsule will soon be sealed in. I believe our successors will enjoy discovering our messages to the future. What are the chances the computer will operate 100 years from now (yes, there is a laptop in the box, but with no battery) or people will know what a USB drive and CD-ROM are?
 The wing of the church that was demolished to make room for our new addition was built starting in 1920. The youth group saved the safe that was hidden behind a panel in the RE office, and several architectural artifacts were rescued, but no secret hiding place with historical information was found. The internet has, however, yielded a treasure of historical photos of the Roush mansion being built.

Our historical building was constructed largely of terracotta block, a predecessor to concrete block. The dining room and front entrance remain. The north wing was demolished in September.

Ninety-seven years later, this photo of our new addition was taken at about the same stage of construction as the 1920 picture.

In this view of the west facade, the demolished wing is to the left.

The west facade of the new addition is dominated by windows that will flood the sanctuary with light.

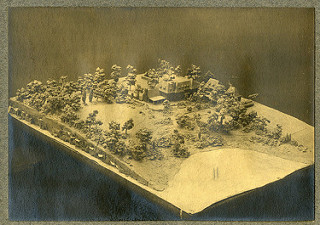
The mansion's former garage...

 This was the view from the back yard in 1920.
And this was the view looking north on Washington Road. Our front lawn is on the left of the photo.
 Getting back to today, the drywall on the west end of the sanctuary has been hung and is ready for taping and finishing.

If you look closely at this photo, you can see that the HVAC vent and the electrical box in the ceiling of the crying room have been extended down a few inches. This will allow the ceiling to be clad with four layers of 5/8 inch drywall to meet the fire code. In a nutshell, when the fire resistance of the rear wall of the sanctuary was upgraded, the window of the crying room had to be upgraded, too. Fire resistant glass is very expensive; the window would have cost about $6,000. So, in order to keep the window and save money, the decision was made to include the crying room in the fire zone with the sanctuary. That means upgrading the ceiling and the walls of the crying room to the same standard as the sanctuary, which is four layers of 5/8 inch drywall on the ceiling and all walls. The door will also be upgraded to withstand fire for a longer period.
 This picture was taken standing in front of the door to room 22, which is now part of the attic and no longer usable as a meeting space because of the fire code and the difficult access. The opening on the left goes to the dormer with the door to the flat roof. Straight ahead and to the left is the main HVAC room. The hallway will have a ceiling and insulation.

This photo was taken in the vestibule to the sanctuary looking up through the return air ducts into the attic.


These windows were formerly doors to the hallway, left, and to the closet, right. The white areas at the top and bottom will be paneled with oak and stained to match the window seats. These windows will look into the stairwell seen above. They will be above and to the right of the ladder.
 (This is a correction from the earlier post.) Finally, a test of the brick accent under the windows is being conducted. The gray scratch coat is seen in this photo. Behind the scratch coat is metal lath, a drainage mat, two layers of waterproof building paper and 1-inch rigid insulation. Behind all that is the Tyvek building wrap and the building structure.
I'm proud of you for renewing the church. It was clever of you to turn those doors into beautiful windows. The vents in the HVAC room look massive. I'm sure the church's congregation is going to love the benefits of all that air. The photos and informative blog post have me excited to see the end result of your efforts.
ReplyDelete